Part 1: Quarto workflow
Workflow to edit a Quarto website source
- Preview the website (
quarto preview) - Make changes to files
- Save and preview how changes are automatically updated!
Demo: Edit and preview a demo.qmd file
I will demonstrate this with the demo.qmd file: watch me and then you will all have a chance to do this yourself.
Preview the website (aka Quarto preview)
Let’s start off by previewing our quarto site locally. In Terminal, in the quarto-clinic folder, type quarto preview, which will provide a URL with a preview of our site!
quarto preview
# Preparing to preview
# Watching files for changes
# Browse at https://openscapes.2i2c.cloud/user/jules32/proxy/4593/
Open this URL in a browser window and arrange your Hub and website preview windows so you can see them both. I make a bit more space in Jupyter by collapsing the left file menu by clicking on the file icon at the top of the left sidebar.
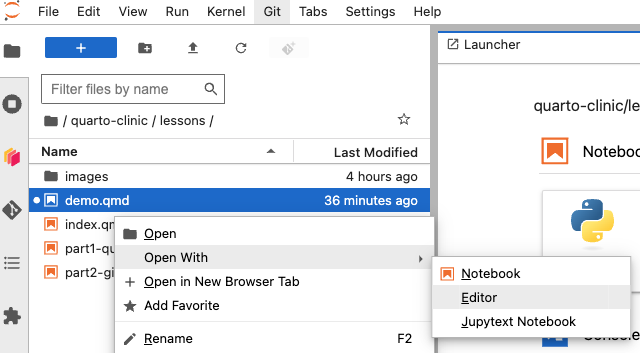
Make changes to files (aka the website content)
Open demo.qmd file using the Editor, not as a Notebook file. Suggestions for things to try, and how to format things are in the file.
I will fix a small typo.
Save and preview automagically updates!
When we save changes, our preview window will refresh automatically and display our changes! If it does not, you can also refresh the page manually.
This is powerful to be able to see live changes in the preview as we edit in our .qmd files.
Your turn
In your breakout room:
- In terminal,
cd quarto-clinicand thenquarto preview - Open
demo.qmdfile - Find the header with your name, edit in that section. Ideas at the top of the file.
- Save,
quarto preview - Repeat!
Regroup discussion topics
- When adding new files, update
_quarto.ymlfile as needed to have new content appear in the site’s nav bar. (see https://openscapes.github.io/quarto-website-tutorial/explore.html)